How to Choose the Right Ebike Cable for Your Bike?
Choosing the right Ebike Cable is a small decision with major effects on safety, comfort, and daily performance. A cable that feels stiff, stretches quickly, or fits poorly can make braking, shifting, or motor control unreliable. The correct choice depends on the cable’s purpose, length, diameter, connector type, and compatibility with the bicycle’s system.
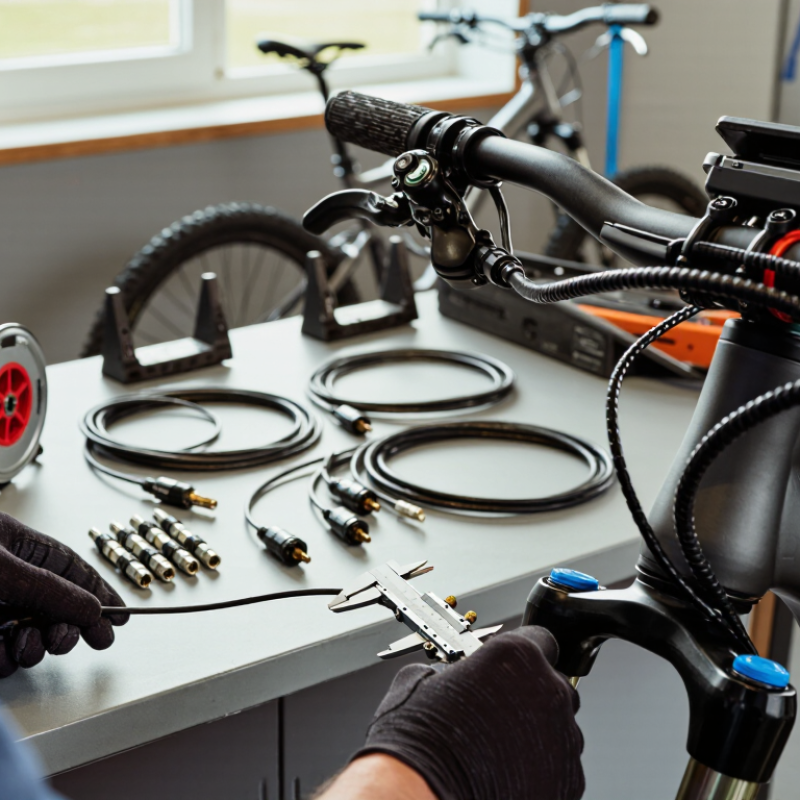
Start with the bike itself. Check the original cable, measure its exposed length, and photograph each connector before removal. Mechanical brake cables usually require different ends from derailleur cables. Electronic systems may need waterproof plugs, specific pin layouts, or manufacturer-approved replacements. Never rely on appearance alone. Two cables may look identical but carry different signals or resist moisture differently.
Small details matter.
A workshop technician would also inspect routing. A cable bent sharply around the handlebar may create resistance, while excessive slack can snag on a rack or wheel. Stainless-steel options often resist corrosion better, especially after wet rides, but coated cables may offer smoother movement inside the housing. The housing must match the cable and should not be crushed by tight frame guides.
Product specifications, installation instructions, and reputable supplier information provide useful evidence. Still, compatibility claims are not always complete. This guide will examine common Ebike Cable types, measuring methods, connector standards, weather protection, and installation mistakes. It will also question a common assumption: the most expensive cable is not automatically the safest choice. Fit, quality control, and correct installation matter more. When uncertainty remains, a qualified bicycle technician should verify the system before riding.
Identify Your Ebike Cable’s Function and Routing Needs
How to Choose the Right Ebike Cable for Your Bike?
Identify Your Ebike Cable’s Function and Routing Needs
Before choosing a replacement cable, identify what it controls. Brake cables transfer hand pressure to mechanical calipers. Motor cables carry power and signals between the battery, controller, and drive unit. Display, sensor, and lighting cables may use different connectors, even when they look similar. Check the cable’s connector shape, wire count, diameter, and length. A close visual match is not enough.
Routing matters as much as compatibility. Follow the original path around the frame, handlebar, and motor area. Leave enough slack for full steering movement, but avoid loose loops that can catch on branches. Keep cables away from sharp edges, hot surfaces, moving cranks, and suspension joints. Water can enter from poorly sealed connections. I once measured only the straight distance between two connectors, and the replacement was too short during a sharp turn. That mistake was avoidable.
Tips: Photograph the original routing before removal. Turn the handlebar fully left and right after installation. Look for stretching, rubbing, or tight bends. Secure cables with suitable clips, but do not crush the insulation. If a cable’s purpose remains unclear, consult the bicycle’s service documentation or a qualified technician. Guessing can damage electronics. Repair decisions deserve patience.
Match the Cable Type, Connector, and System Compatibility
Choosing an ebike cable starts with the system, not the plug’s shape. A motor cable carries phase power; a sensor cable carries low-voltage signals. Battery leads need suitable current capacity, insulation, and strain relief. I once treated two waterproof connectors as interchangeable. They were not. Pin order differed, and the controller would not initialize.
Match the cable type to the motor, controller, display, throttle, brake sensor, or battery port. Then verify connector gender, pin count, keyway, wire colors, and locking method. Wire color is only a clue. Check the controller manual and measure voltage with a qualified meter. For outdoor use, compare the stated IP rating under IEC 60529. A thicker-looking cable may still have weak terminals. Cable length matters too; tight bends can pull pins loose near the axle.
System compatibility includes voltage, current, communication protocol, and firmware behavior. A cable can fit physically and fail electrically. The U.S. CPSC reported 208 micromobility fire incidents from 2017 to 2021, with 19 deaths. That data supports careful inspection of heat-damaged insulation and loose battery connections. The IEA’s Global EV Outlook 2024 identifies electric two- and three-wheelers as the most electrified road-transport segment. Still, I would not rely on market growth to justify a substitute cable. Record the original pinout before replacement, and photograph each connection.
Choose the Correct Cable Length, Gauge, and Insulation
How to Choose the Right Ebike Cable for Your Bike?
Cable length, gauge, and insulation directly affect an ebike’s safety and performance. Measure the cable route from the battery or controller to the motor. Turn the handlebars fully left and right during measurement. Add a small service loop, but avoid excessive slack. A cable that is too short can pull connectors apart. A cable that is too long may rub against the frame or steering parts.
Choose the gauge according to current, cable length, and system voltage. Higher current and longer distances usually require thicker conductors. Check the controller specifications instead of guessing. Thin cable can create voltage drop, heat, and unreliable motor behavior. Connector shape and pin layout must also match exactly. I have seen careful installations fail because the cable length was correct, but the conductor size was overlooked. That mistake is easy to repeat.
Tips: Choose insulation rated for outdoor use, moisture, heat, and abrasion. Flexible insulation helps around moving handlebars. More insulation is not always better; stiff cable can stress connectors. Inspect the cable near the motor and battery after several rides. Look for cuts, flattened sections, or discoloration. If the specifications remain unclear, ask a qualified ebike technician to verify the cable before installation.
How to Choose the Right Ebike Cable for Your Bike? - Choose the Correct Cable Length, Gauge, and Insulation
| Cable Application | Typical Circuit | Recommended Copper Conductor | Common Cable Length | Typical Continuous Current Range | Recommended Insulation | Selection Guidance |
| Battery to controller | Main power connection | 12–10 AWG
(approximately 2.05–2.59 mm conductor diameter) | 0.5–1.2 m | 15–30 A, depending on the controller and installation conditions | Flexible PVC or cross-linked polyethylene (XLPE), rated for at least 60 V DC | Use the shortest practical route. Select the conductor from the controller's maximum battery current, not only the motor's nominal wattage. |
| Controller to motor | Three-phase motor power | 14–12 AWG
(approximately 1.63–2.05 mm conductor diameter) | 0.8–1.8 m | 10–25 A per phase in many systems | Oil-resistant, abrasion-resistant PVC or XLPE with flexible stranding | Allow extra length for steering, suspension movement, and wheel removal. Keep the cable away from sharp edges and hot brake components. |
| Battery to display or accessory | Low-power auxiliary supply | 20–18 AWG
(approximately 0.81–1.02 mm conductor diameter) | 0.6–1.5 m | Up to approximately 5 A | Flexible PVC or thermoplastic elastomer (TPE) | A smaller conductor is usually adequate, but verify the accessory fuse rating and connector specification before installation. |
| Brake cut-off sensor | Low-voltage control signal | 24–22 AWG
(approximately 0.51–0.64 mm conductor diameter) | 0.5–1.2 m | Normally below 1 A | Flexible, flame-retardant PVC or TPE | Prioritize flexibility and secure routing over high current capacity. Leave enough slack for full handlebar rotation. |
| Throttle or control switch | Signal and low-current power | 24–22 AWG
(approximately 0.51–0.64 mm conductor diameter) | 0.6–1.4 m | Normally below 1 A | Fine-stranded PVC or TPE with good flex-life performance | Use a multi-core cable when signal, ground, and supply conductors share one jacket. Avoid tight bends near the handlebar. |
| Pedal-assist sensor | Speed and cadence signal | 24–22 AWG
(approximately 0.51–0.64 mm conductor diameter) | 0.7–1.5 m | Normally below 1 A | Flexible PVC or TPE; shielded construction may help in electrically noisy layouts | Route separately from high-current motor cables where practical. Protect the sensor lead from chain contact and crank movement. |
| Lighting circuit | Headlight, taillight, and auxiliary lighting | 20–18 AWG
(approximately 0.81–1.02 mm conductor diameter) | 0.8–2.0 m | 1–5 A, depending on the total lighting load | UV-resistant and weather-resistant PVC or TPE | Calculate current as total power divided by system voltage. Add a fuse sized for the cable and load. |
| Rear-rack or extended-frame routing | Long power or accessory cable run | Use one gauge larger than the minimum calculated size; for example, 14 AWG instead of 16 AWG for a higher-current run | 1.5–3.0 m | Depends on the circuit and cable installation | UV-resistant, abrasion-resistant, water-resistant jacket with flexible conductors | Longer runs increase voltage drop. Measure the complete circuit length, including the positive and negative conductors. |
Practical selection guide for common ebike wiring. Current capability depends on conductor material, insulation temperature rating, bundling, ambient temperature, connector limits, and local electrical requirements. Always confirm the ebike manufacturer's wiring specifications before replacement.
Evaluate Environmental Durability and Installation Requirements
How to Choose the Right Ebike Cable for Your Bike?
Evaluate Environmental Durability and Installation Requirements
Choosing an ebike cable is not only an electrical decision. Weather and installation conditions often determine whether a cable remains dependable. Consider rain, road spray, dust, vibration, ultraviolet light, and winter salt before buying. For outdoor exposure, inspect the connector’s sealing design and its stated ingress protection rating. Do not treat a high rating as permanent immunity. Crushed housings and loose seals can still admit water. Small details matter.
Measure the route from the battery, display, sensor, or motor before selecting cable length. A cable stretched tightly may pull connectors apart during steering or suspension movement. Leave a gentle service loop, but keep it away from tires, chains, and sharp frame edges. Use suitable clips or protective sleeving where gravel can strike the outer jacket. Check conductor size, connector type, voltage, current capacity, and polarity against the bicycle’s service documentation. Appearance is not proof of compatibility.
In practical workshop checks, I look for chafing near the head tube first. That area flexes repeatedly and is often overlooked. After installation, turn the handlebar fully left and right. Watch for tension, pinching, or a cable that brushes the wheel. Then test assistance, braking sensors, lighting, and display functions in a dry, controlled setting. I once accepted a neat route that was too tight; it needed rework. That mistake was avoidable.
Test the Cable and Confirm Safe Ebike Operation
How to Choose the Right Ebike Cable for Your Bike?
Test the Cable and Confirm Safe Ebike Operation
A suitable ebike cable must match the connector, wire count, voltage, and component function. A cable may fit physically but still carry the wrong signals. Check the controller, display, motor, brake sensor, and battery cable separately. Never force a connector into place.
Disconnect the battery before inspecting pins or checking continuity. Look for crushed insulation, loose terminals, moisture, and darkened contact surfaces. I once found a cable that looked clean but had a broken conductor near the handlebar. Gently bend the cable while testing continuity. The reading should remain stable. If it changes, replace the cable.
Reconnect everything only after the inspection. Lift the driven wheel clear of the ground, then apply power at the lowest assistance level. Confirm that the display starts normally and the motor responds smoothly. Test both brake levers. Motor assistance should stop immediately when either brake sensor activates. Wiggle the cable near the steering area and frame guides. Watch for flickering, unexpected acceleration, or error messages.
Take a short test ride in an open, quiet area. Use gentle braking and low speed. Stop immediately if the motor cuts in and out. No test is perfect. I sometimes recheck connections after the first ride because vibration can reveal problems missed in the workshop. When the wiring diagram or pin layout is unclear, a qualified ebike technician should verify it before use.
